There is more to controlling a flying machine than simply moving a control stick. You’ll need to accomplish many things during the flight:
- monitor your airspeed
- raise and lower the landing gear
- release from the tow plane if you are being towed into the air
- increase or decrease your rate of descent using airbrakes (spoliers)
- adjust you flight computers for best speed to fly at any given time
- adjust you navigation maps for different view points
- switch the glide computer to calculate altitude needed for goals
- use trim buttons to hold the plane steady as speed changes
- control your radio or other comm. equipment to talk with others
- etc
Just installing the software into the computer will allow you to have a view of your surroundings as you look out of the canopy, but you need to be able to swivel you head to view left – right , up and down as well as lean forward in you seat to see the instruments better, lean back to see more of the surrounding area, etc.. You’ll need to push buttons to accomplish all of this.
I have tried three different methods of Control Inputs.
The first…
and very effective method for the beginner is to use the mouse and the computer keyboard, supplemented with a key pad. The mouse will operate like the glider control stick (bank right and left, pitch up and down). The computer keyboard along with the specially labeled number pad will help you to fly with one hand on the mouse and the other on keyboard and number pad.
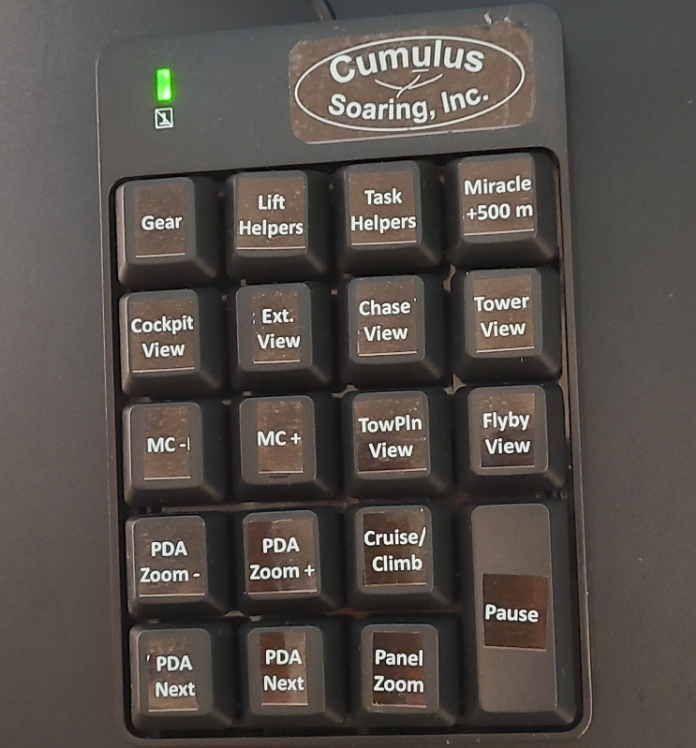
The key pad from Cumulus helps to limit the need to search for some of the keys most commonly used. (most effective when initially learning to use Condor).
A second method…
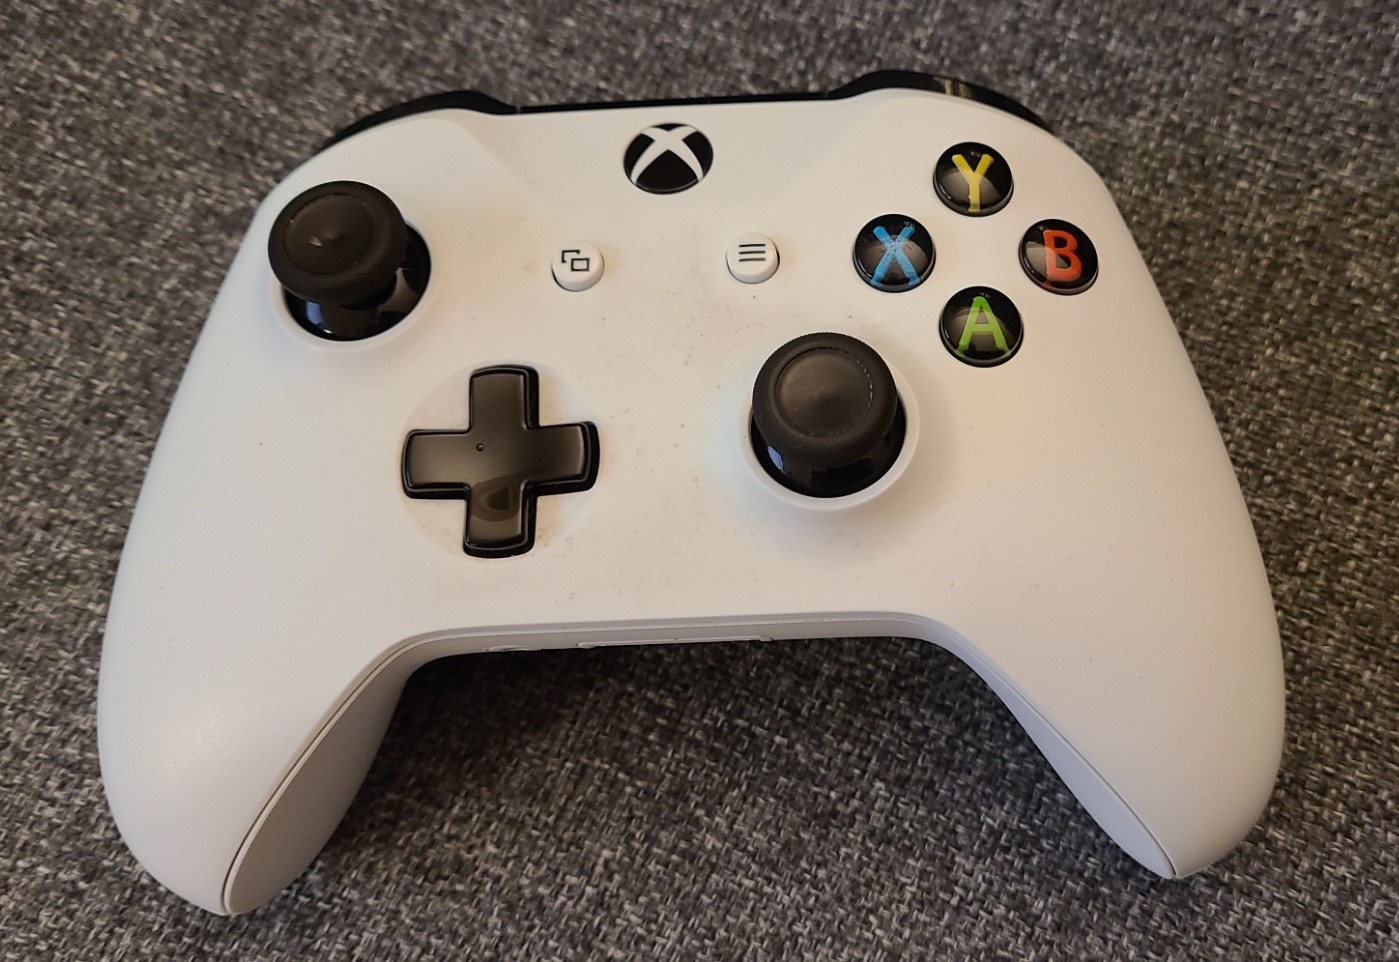
of flying Condor is to use an Xbox controller, using the right stick as if it were the control stick (R, L, up and down), and assigning some of the other buttons and controls on the controller as needed. however you may benefit from having the key pad as shown above, to supplement the computer keyboard. However, it takes a bit of skill to operate the controller with one hand while you other hand controls keyboard inputs. I found this to be least effective method for flying, but some pilots love it.
The third method,….
and the one I now use most often is the “Logitech Extreme 3D Pro” stick sold by Cumulus for $50, and programming the 13 or so buttons on that stick. I couple this with the number key pad and the computer keyboard as needed for additional inputs.
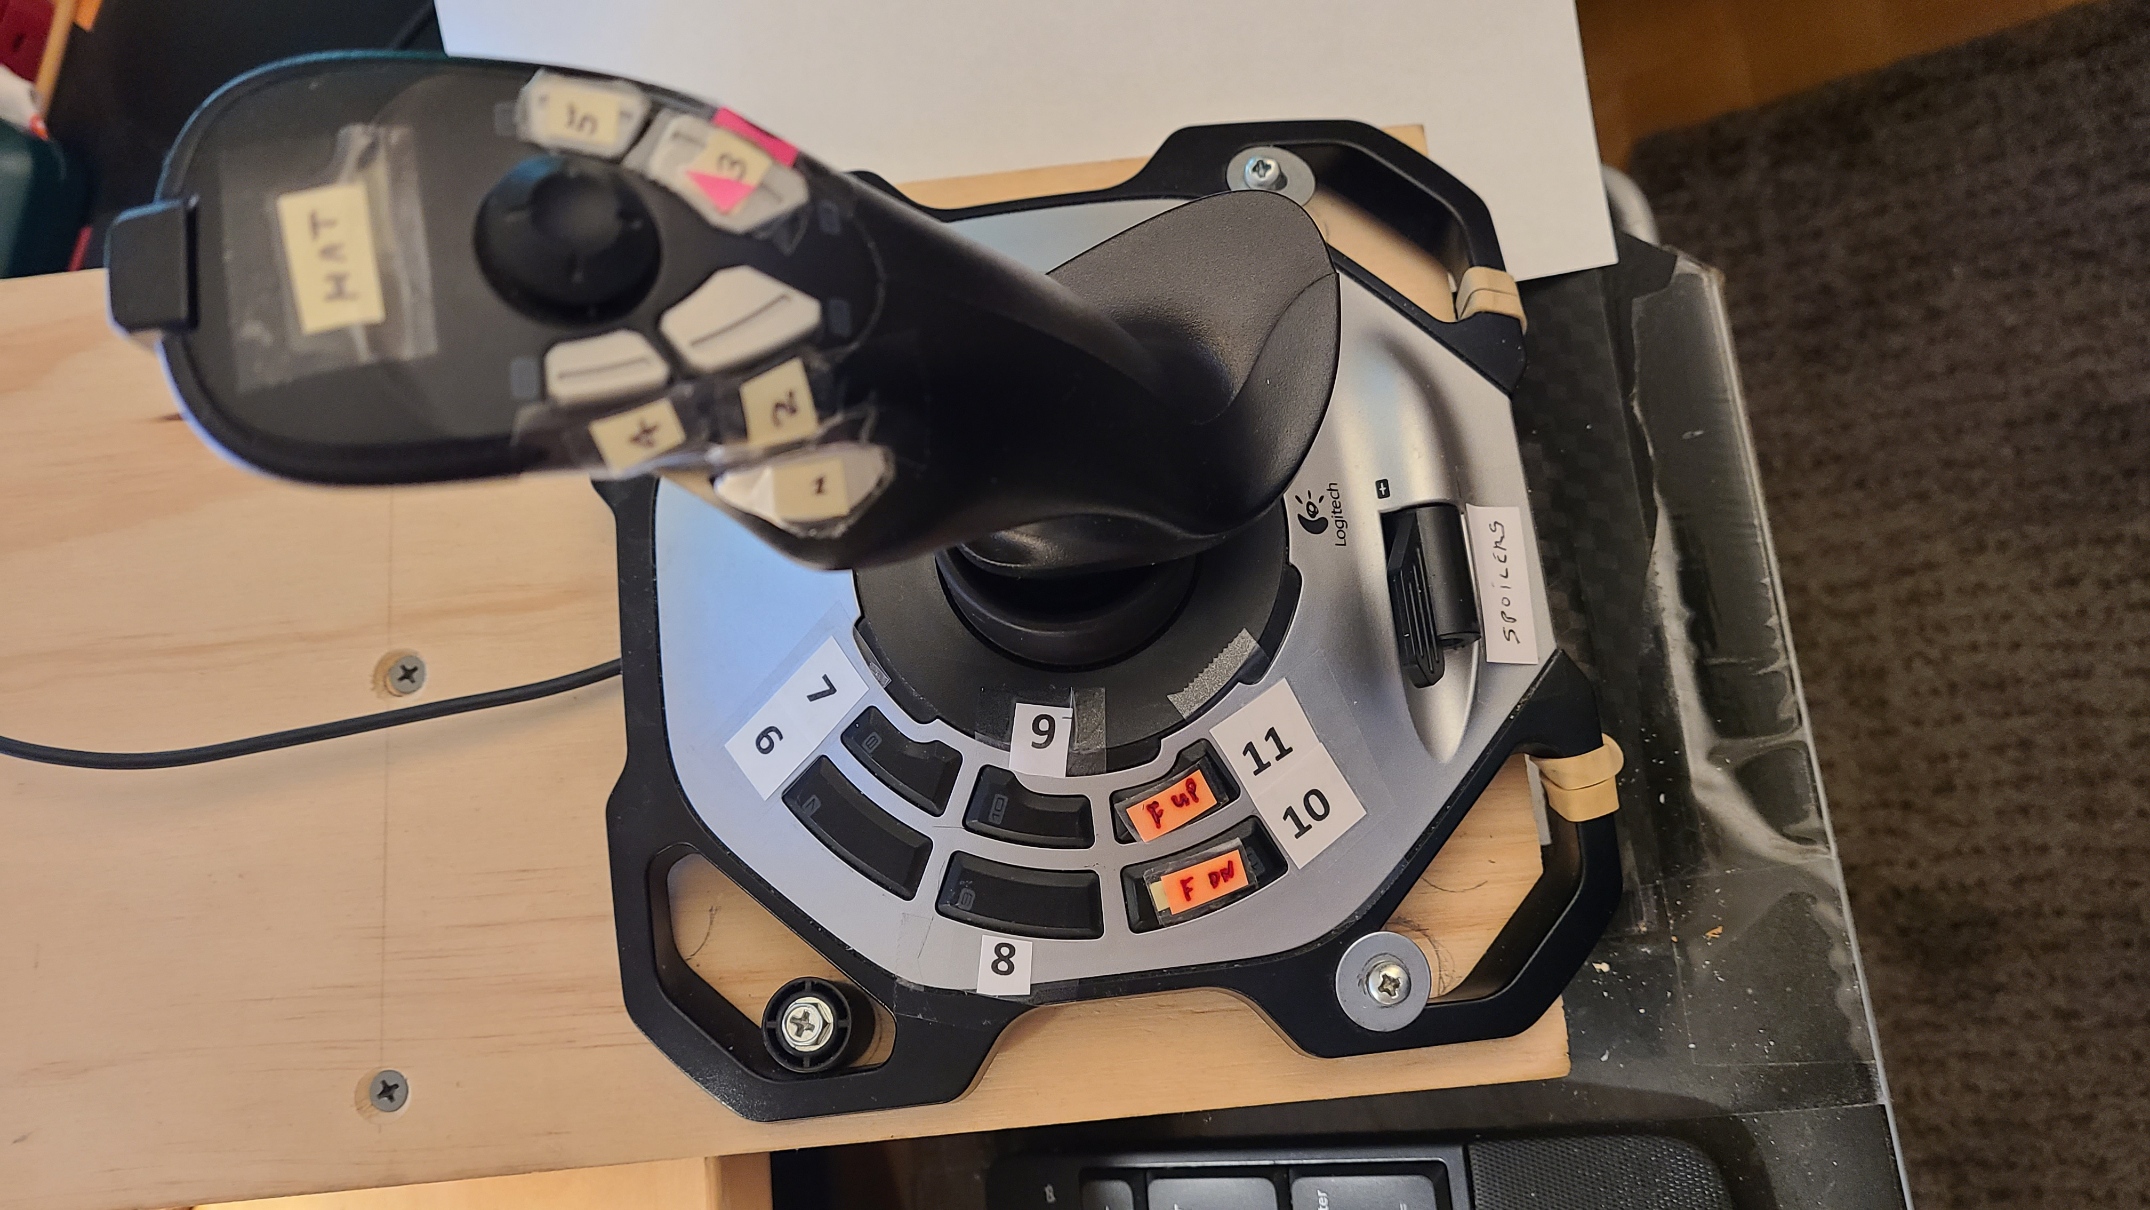

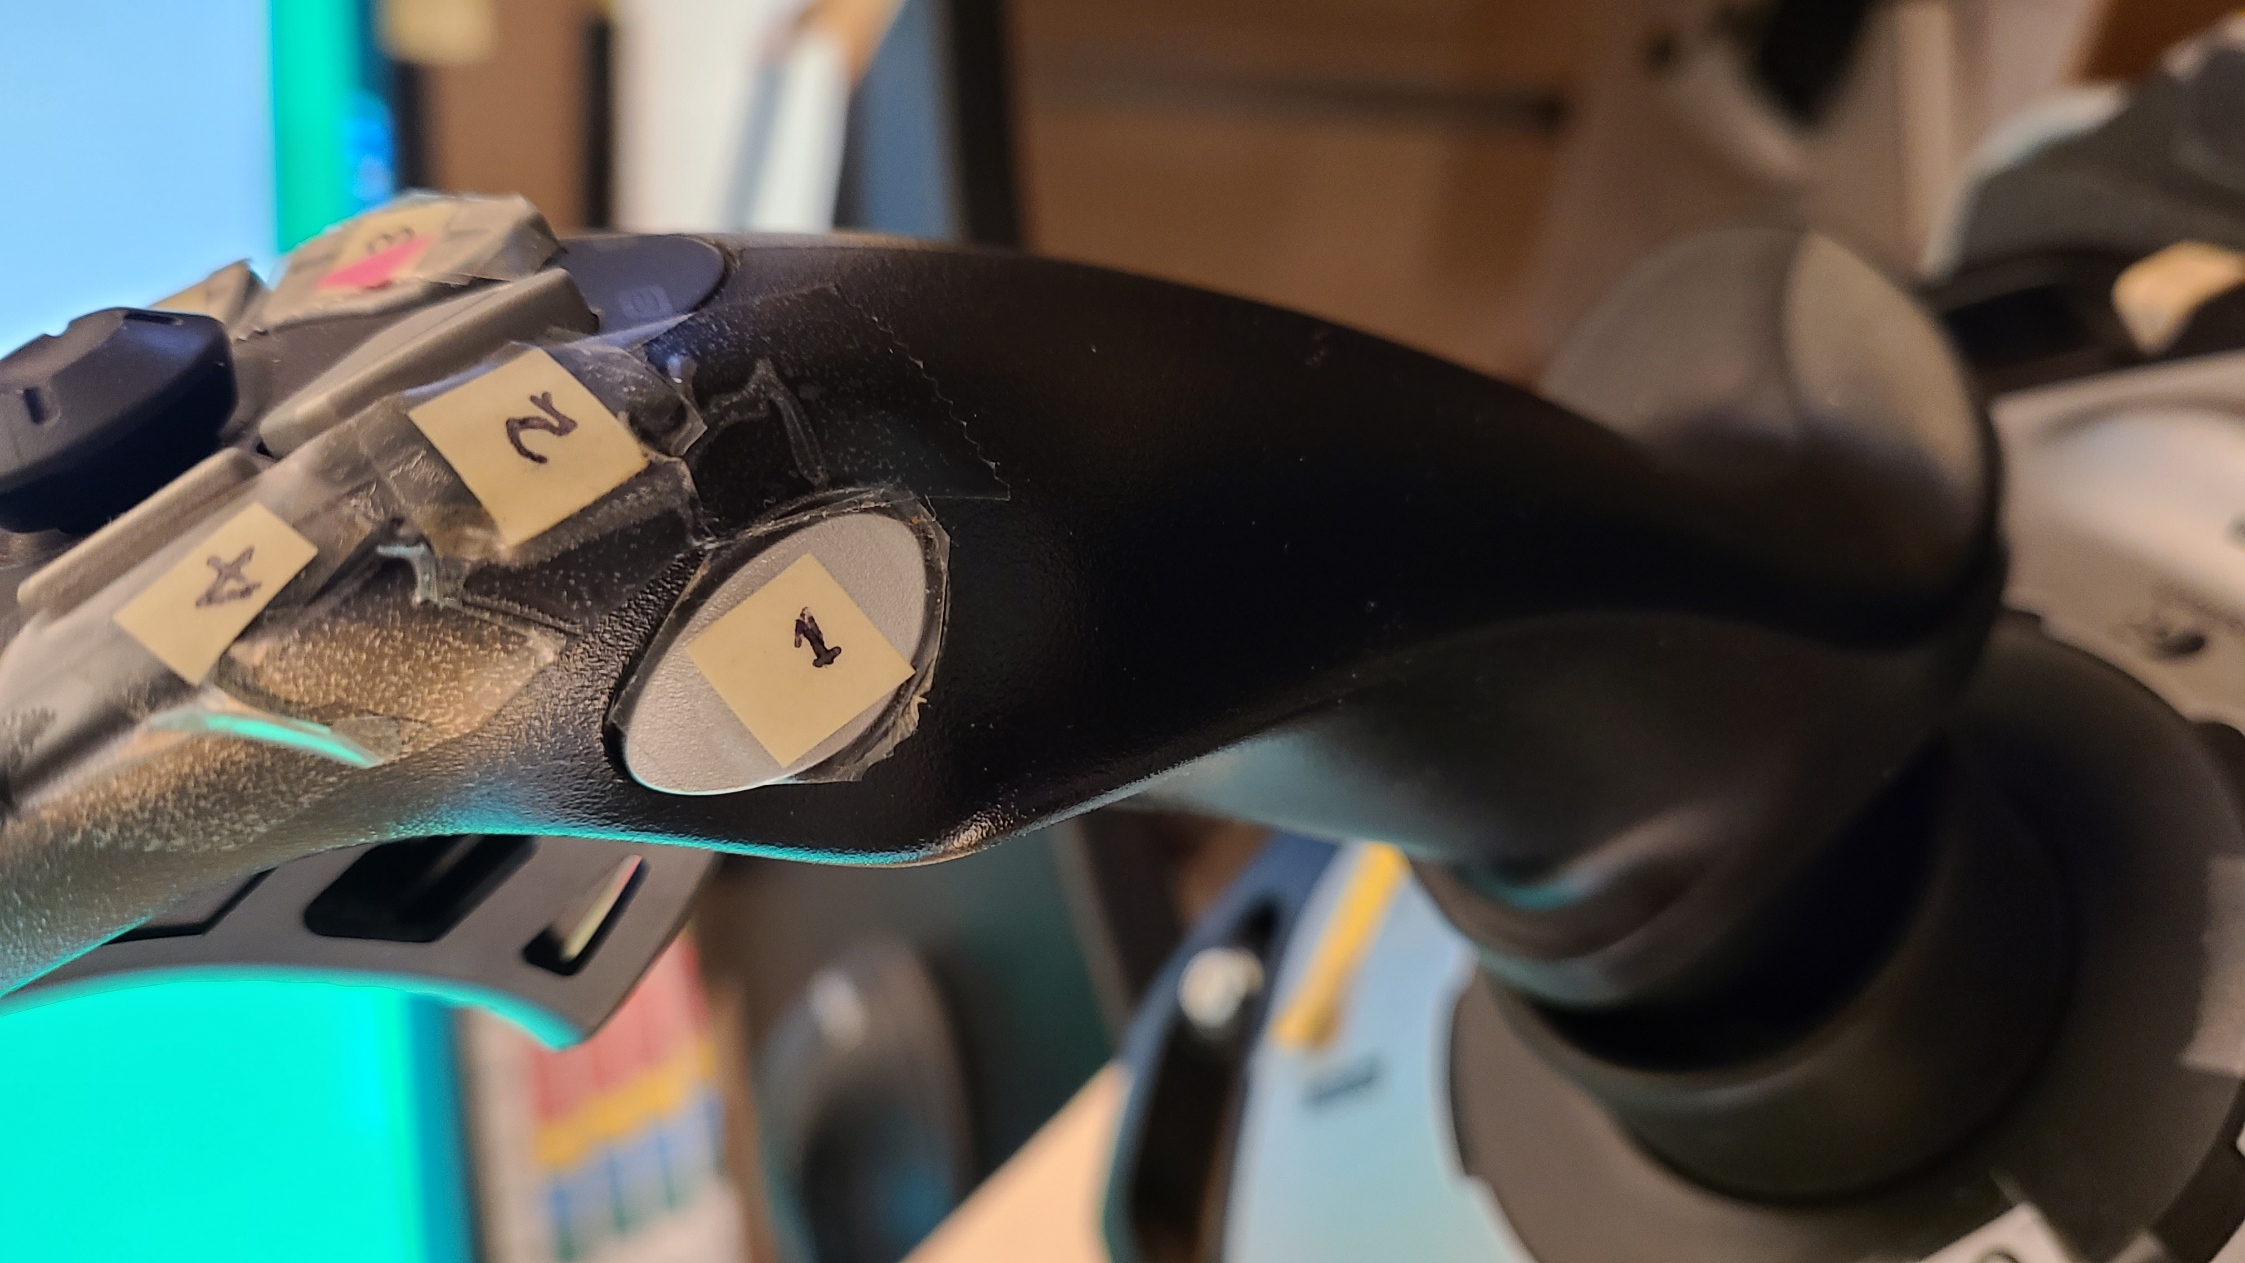
I have crudely labeled here for your benefit, some of the buttons, and assigning the respective buttons only takes a few minutes.
I particularly like using button # 3 for nose up trim and button # 4 for nose down – just like on most jet planes.
The stick is a bit cumbersome, but I find it to be effective. It does have a twist grip (allowing yaw via rudder inputs), but I typically do not assign yaw to that axis. I leave the rudder input set to “Auto rudder” on the input page (unless I am encountering, or practicing severe crosswinds on takeoff or landing).
If you purchased the key pad from Cumulus Soaring, Inc., it comes with the keys being labeled. This keypad, coupled with the keyboard and the Logitech Extreme stick seem to be the most effective method for flying. This would also be my choice if I am flying with a Visual Reality (VR) headset…. which is a totally different experience.
Visit other pages to see comments on how to assign functions to keys and my comments about flying with Visual Reality goggles.
End