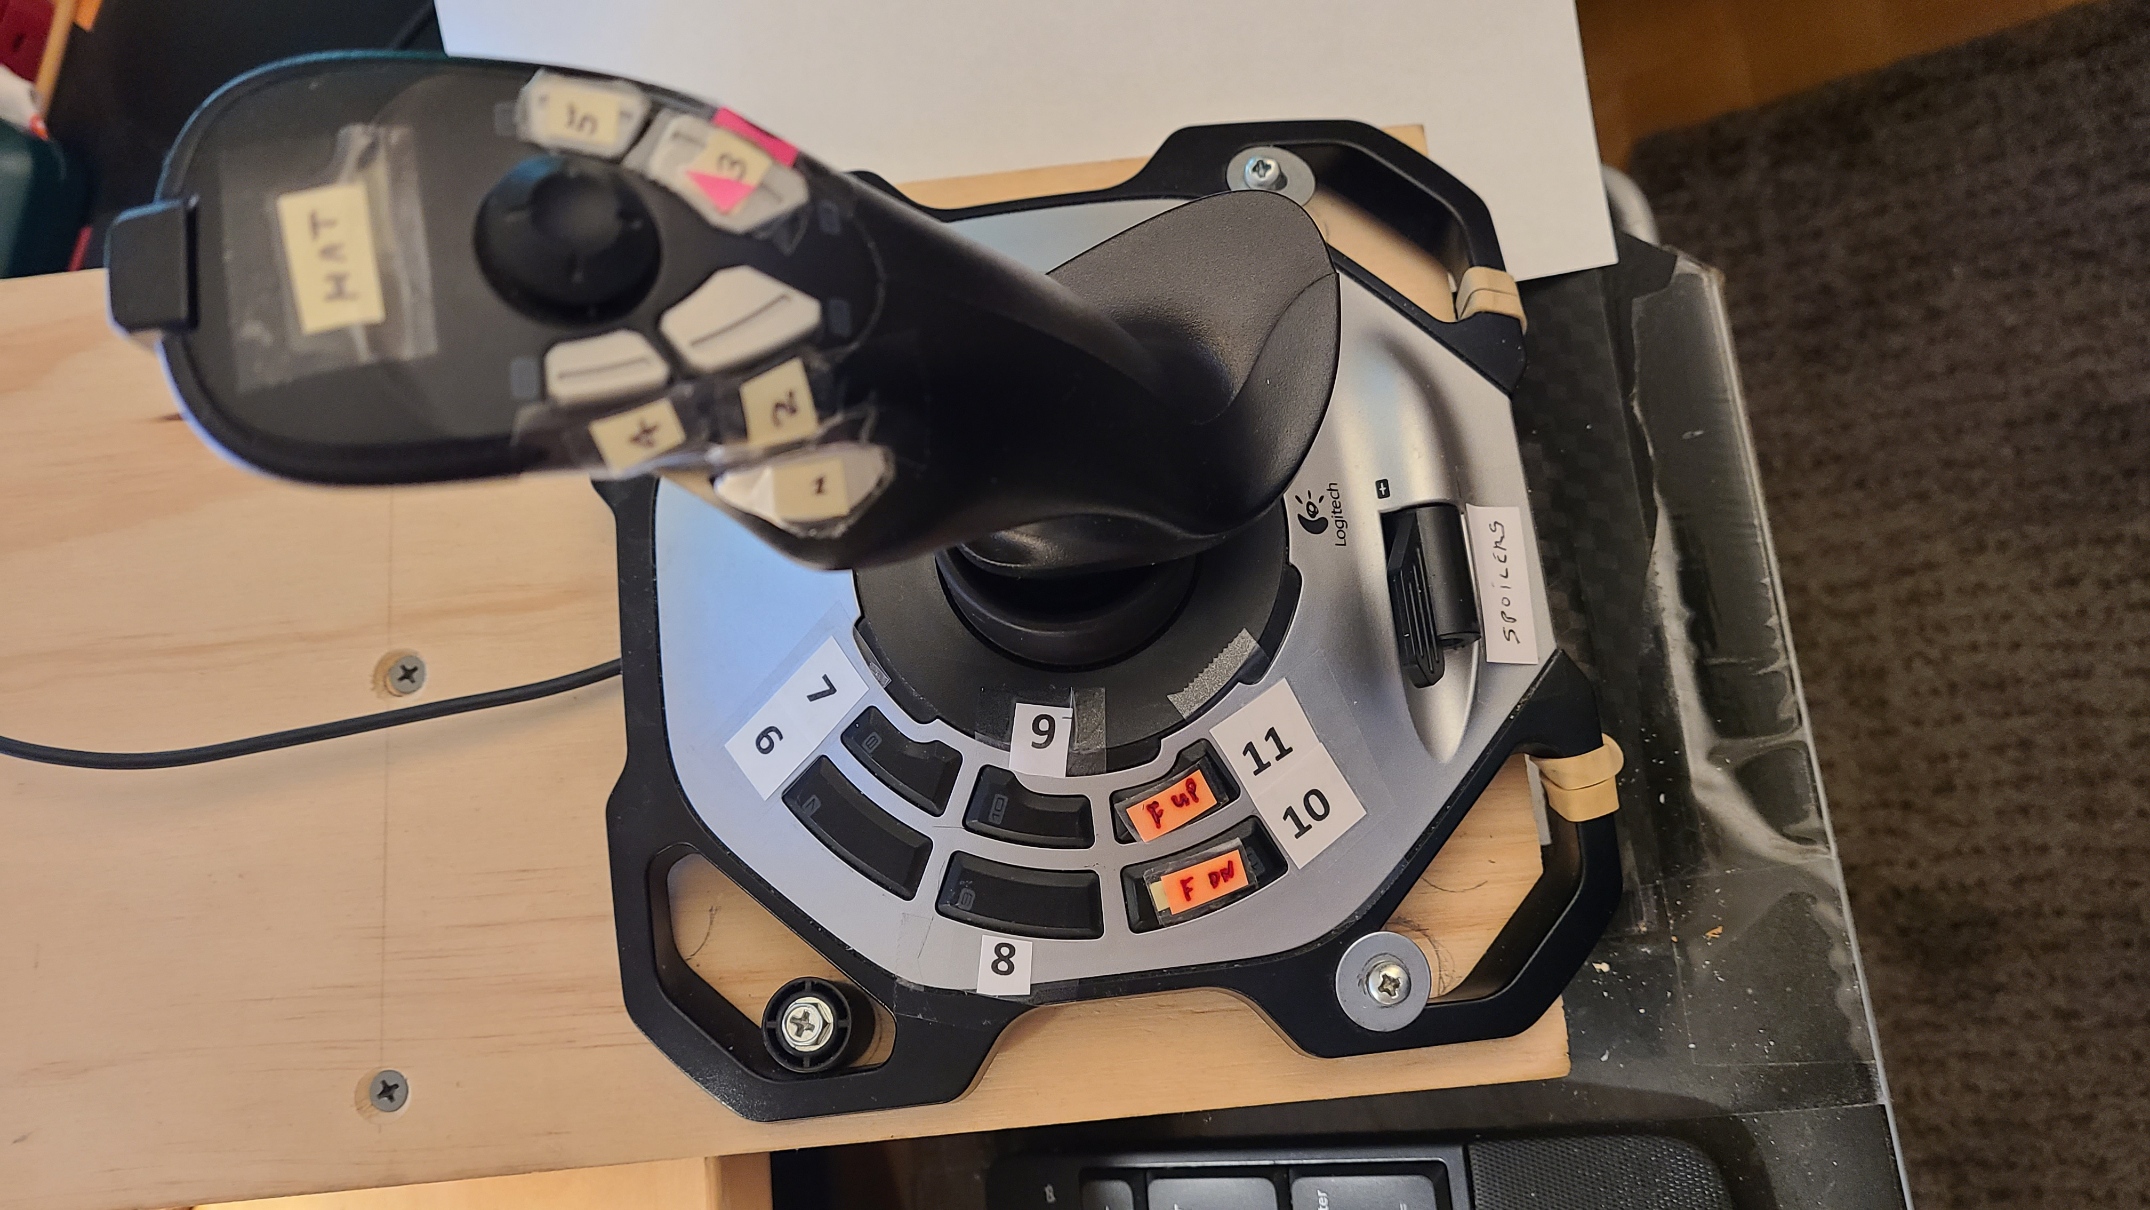
On the Logitech Extreme 3D PRO assign each axis of the control stick and each of the 13 buttons to an action/ function in the Condor program.
Open Condor and go to /setup, /input, and /assign controls.
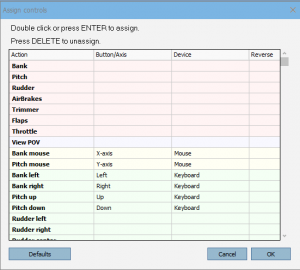 Top item on the list is Bank. Simply double click on the center box to create a red border, and move the joy stick sharply to the left – you will see “X Axis” in that box.
Do similar action of Pitch – sharp pull back – for Y Axis.
Rudder is rotation of the stick (Z Axis).
Air Brakes -Highlight the adjacent box and move the Slider at the rear base of the stick.
There are four buttons, plus hat switch on top of the stick.
7 o’clock position is button 2 and forward of that is button 4
Scroll down to “Trimmer up”, high light the box hit button 2
Scroll down to “Trimmer down”, high light the box hit button 4
Scroll down and assign as follows…
View reset – button 1
View snap left – button 8 on base left side outer ring
View snap right – button 9 on base left side inner ring
Zoom in – button 6on base left side fwd outer ring
Zoom out – button 7 on base left side fwd inner ring
The trigger on the stick is button 0 – use this for screen shots.
On the number pad from Cumulus Soaring Inc., select each action on the “assign controls” page and push the corresponding button on the pad to be sure they are all programmed correctly.
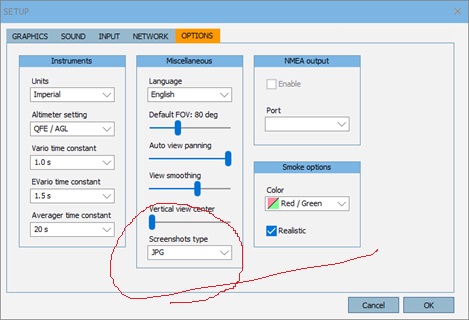
Note on screen shots. On the “Options” page, besides selecting Imperial and QFE, be sure to change your screen shots from BMP to JPG for easier file management.
End